- You are here:
-
Home

-
LabPP_Landscape - landscape design for ARCHICAD
- Gude LabPP_Landscape


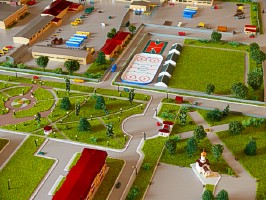
In the life of even the same plants have differences in form and not exactly correspond to the landing site.
In order to make the project more attractive and more realistic, LabPP_Landscape provides a new feature that allows you to randomly influence the parameters of the selected objects.
The limits of variation of parameters and the list of parameters that will impact specified by the user.
The new function is called by button with playing dice on the tool palette LabPP_Landscape.
The function applies to objects that are selected in the ARCHICAD window.

In the following dialog you can specify the following settings:
"mirroring" - when enabled, allows the program randomly flipping objects.
"length and width" - allows you to randomly change the size of objects. The maximum change specified in the box next to the percentage of the current value of the object.
"(xy)" - if the flag is set, then the x and y coordinates will change to a random value, if the flag is not set, then for each coordinate will be calculated own random number.
"the height of the object" - changes the height of the objects ARCHICAD or the ratio of width to height (for objects LabPP_Landscape).
"object position" - the position of the object in the plan. The limits of variation are given in percentage of the current width of the object.
"rotate object" - objects and elements in the sample will be randomly rotated around its axis.
The minimum and maximum change in the parameters input field you can specify in the range from 0 to 100%.
By pressing "OK" the function starts executing.

For best result you can start the function again, or again any number of times.

To use variation of parameters, you should select the objects on which You want to perform this operation.
Not only objects, plants may be subject to occasional change. However, there are often situations when you want to select only objects of plants. For example, if You set the plant on a pedestal, it is desirable that in contrast to plants, the object of the pedestal changes were not exposed.
To select plants quickly and easily use the special button in the following order.
Select the regular means of ARCHICAD objects. Let in grouped objects and other.

By pressing the button in the sample will be only objects of plants.
Then you can immediately perform any operations including automatic variation of parameters.

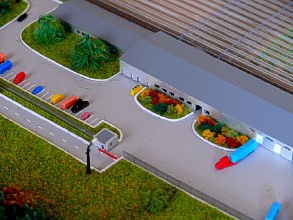
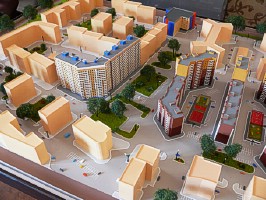
To quickly create an imitation of houses or similar objects makes sense to use objects-pictures can be set as the facades.
For this purpose, the set LabPP_Landscape a library feature LabPP_Fasade.gsm.
As an example, to simulate a residential home will create an object "3-d mesh" in the size of the building.
Place object LabPP_Fasade.gsm.

In the object settings, you can specify the file name of your own image.
We remember that if the image file just created, we need to update the library Manager the directory with the picture, so it was available in ARCHICAD.
The objects of the facades can be switched in a mode of primitive display.
In order to avoid flaws with overlap of the overlay images for rendering, the drawing of the facade object is at a short distance from the base object. This provides the convenience of manipulation of objects facades.
Don't forget that Your picture should be available for ARCHICAD.

LabPP_Landscape can be used to create roads curved surfaces.
Unlike many other applications for ARCHICAD LabPP_Landscape gives you full control over the creation of the road.
So, the way you can build with mathematical precision in accordance with the requirements of applicable rules and regulations to define its surface.
In the figure below you can see the road, which was created in the 3d object mesh.On this 3d grid was held the line of fracture with the points of the surface elevation.
But these points of elevation should be properly positioned in height so they made a smooth transition surface at a predetermined level.
This item was created to Morph, it can be seen in figure 3d grid.
To create this element we have created the cut and the cut asked polyline smooth road profile.
When creating a profile we can precisely control such parameters as road angle, radius, height, etc.
Then a magic wand was created based on the polyline object Morphs. Then in the 3d window has expanded so that it could serve as a substrate under a 3d mesh of the road.
Placeable substrate at the level of the future road and carry out the gravity points on the surface Morph of the substrate.
Please note that the road surface is obtained at an angle. This is because we asked for clarity so the shape of the substrate (3d-mesh coffee color).

A 3d mesh element earth looks in a 2d window like this:

Here the figure shows how there are elements of curbs and road markings.
A 3d mesh element road surface looks in a 2d window like this:

To the road surface well went on any form of surface, we asked when creating more points.
In General the road surface is made so.
First drawn polyline path. Then we set up the magic wand ARCHICAD to create the contour of the required number of segments per unit of perimeter (here a point for every 0.5 meters).
How to adjust a magic wand in ARCHICAD
Then on the toolbar, chose ARCHICAD 3d mesh and hold the space bar is clicked with the mouse on the contour of the road surface.
The result is an element of the road surface automatically.
A large number of points will not give us trouble, since we can at any time to land them all automatically to the surface of any shape (though hilly, flat) with LabPP_Landscape.
To have landed on the substrate, only the desired point, we set the object Shading and use it as permitting the filter.
Then the operation of landing points is performed only over those points of the 3d grid that are within the hatch boundary.

The layout performed by the elements a Beam.
These items we will automatically prizemljem to the road surface.
LabPP_Landscape chooses the angle for the beams. And they are arranged nicely on the road surface.
So you can draw arbitrarily complex elements of the road marking.
Curbs also ask beams.
Clicking on the contour of the road surface element in the 2d window is a magic wand we create automatically a chain of borders.
We prizemljem on the surface of the road surface is slightly raised above it. The angle of each border can be selected depending on the inclination of the surface in each particular stretch of road.

Here are the elements of road marking before landing on the road surface.
If you need to make adjustments to the project, this procedure is easy to repeat by altering the substrate and generally in any items used to build the road.
With a little practice You will easily be able to use LabPP_Landscape in such situations to significantly simplify your work.

Page 2 of 4

")